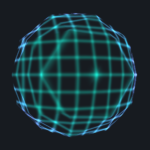
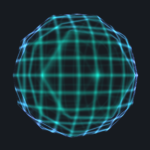
For this tutorial we will develop Grid Hologram. To do so, we will use previously created shader (Basic Hologram) and we will extend it for new functionality. You can get (Basic Hologram) from my github. As previously we will need two passes for a front and back model rendering. However, just for sake of simplicity and clarity let’s remove the first pass (the one which include Cull Front line), so we will draw only the front of model. At the end we will bring it back with few changes.
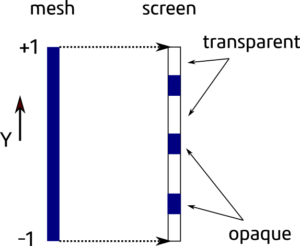
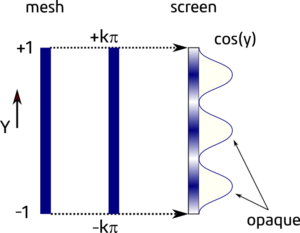
I named this shader a grid hologram and what I would like to achieve is shader which will draw only lines insteded of full model. Or to be more specific looped lines in each plane of the model (x, y, z). To explain it better let’s think in one dimension for a moment. Assume our model is just line along y-axis (Figure 1). Instead of seeing a full line on our screen we want select some part of the model to be rendered as transparent and some as a transparent. As you can see from Figure 1 the choice which part is transparent or not can be determined by position of a vertex in the object space.The object vertexes have coordinate from -1 to +1 so we can write a function to check for the position of a vertex and draw a pixel (fragment) as opaque or not. However I would like to obtain a smooth transition between the opaque and transparent part of rendered model. In that case a cosine function become really handy. To work with a cosine function, we will transform the vertex coordinate values (-1 to +1) into radians (-kπ to kπ), where k is integer and it will determine number of the cosine cycle (Figure 2).
As you can see the first our task to create something like this, we need get value of the vertex position. We can do it by passing the vertex position from the vertex shader into the fragment shader.
 - in v2f struct add: float4 localVertex : TEXCOORD2;
 - in Vert Shader add: o.localVertex = v.vertex;
Before starting any calculation let’s define two useful constants π and 2π by adding:
#define PI 3.14159265
#define TWO_PI 6.2831853
And add shader property, (k integer from Figure 2) it will control number of opaque lines:
 - in properties section add: _CycleCount("Cycle Count", Range(0,40)) = 1
 - before fragment shader add: float _CycleCount;
Finally in the Fragment Shader add these lines to applied cosine function to vertex position:
 float mask = cos(PI * i.localVertex.y * _CycleCount);
 mask = (mask + 1.0) * 0.5f;
 col.a *= mask;
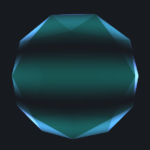
The effect of these changes (_CycleCount = 3), can be seen on figure 3. This already looks quite nice and it can be use for making a scanning animation by adding _Time variable inside a cosine function.
In the next step I would like to get better a line definition or even better I would like to have control of the line width. This can be achieved by applied the power function to the mask value as fallow:
- in fragment shader add: mask = pow(mask, _LineDefinition);
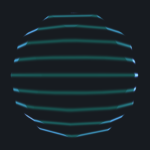
_LineDefinition is a shader new property which allows us to control a width of the line. (Create it in analogical way to _CycleCount). The effect of this addition can be seen on Figure 4.
And now we need to replicate this to x- and z- axis. Please add this to your fragment shader to get effect presented on Figure 5.
// Y - axis
 float maskY = cos(PI * i.localVertex.y * _CycleCount);
 maskY = (maskY + 1.0) * 0.5f;
 maskY = pow(maskY, _LineDefinition);

// X - axis
 float maskX = cos(PI * i.localVertex.x * _CycleCount);
 maskX = (maskX + 1.0) * 0.5f;
 maskX = pow(maskX, _LineDefinition);

// Z - axis
 float maskZ = cos(PI * i.localVertex.z * _CycleCount);
 maskZ = (maskZ + 1.0) * 0.5f;
 maskZ = pow(maskZ, _LineDefinition);

 float mask = (maskX + maskY + maskZ) / 3.0;
And finally we can add back the second pass in order to draw a backside of the model.The second pass will be almost the same as first, so you can copy and past. Hoever to draw the backside of mesh change the Culling flag to Cull FRONT. For better visual effect it is good to dim a bit the colour intensity for this pass.
- in fragment shader add: mask *= 0.1;
The final effect can be seen on Figure 6 and in video attached bellow.
And that is the end. On github you can get the final version of this shader. Thank you veru much for reading.
